

Create an EC2 instance and start installing JAVA, MAVEN and TOMCAT
Create another EC2 instance to install Jenkins
Install java 17
sudo apt update
sudo apt install openjdk-17-jdk -y
sudo apt install openjdk-17-jre -y
java --version
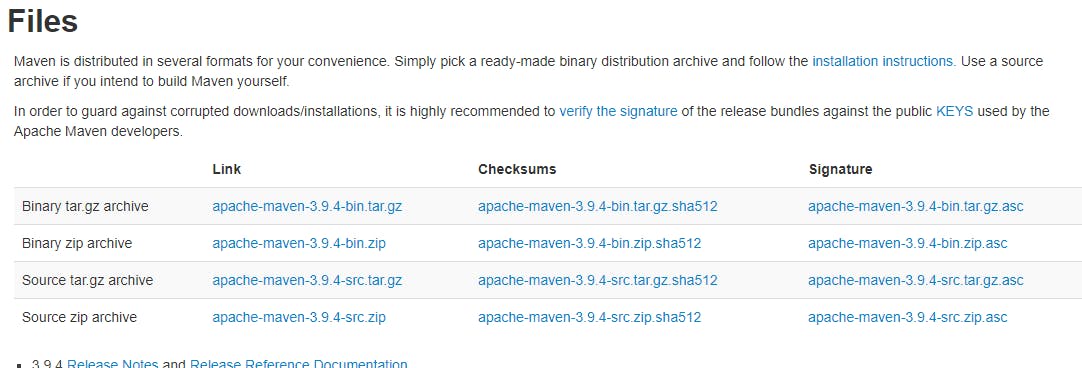
Install the latest Maven version
First, we’re going to find the most recent release – it’s available on the Downloading Apache Maven page:
wget https://dlcdn.apache.org/maven/maven-3/3.9.4/binaries/apache-maven-3.9.4-bin.tar.gz
sudo tar xf apache-maven-3.9.4-bin.tar.gz -C /opt
ls -la /opt
x – extract the given file from an archive (operation mode);
f – use archive file (device selection);
C /opt – change to the /opt directory before performing any operations (local file selection).
Set environment variables for Maven
Now we will permanently set the environment variables for Maven. First, I’m going to create a symbolic link between the apache-maven-3.9.4 and new /opt/maven locations so that I don’t have to edit the variables the next time I update Maven:
sudo ln -s /opt/apache-maven-3.9.4 /opt/maven
cd /opt
I’m going to use the link as a value of the Maven environment variables. This way, the next time I update Maven I will simply change the symbolic link to point to a newer release.
I’m going to create a new script file called maven_home.sh and put it in the /etc/profile.d/ directory:
sudo nano /etc/profile.d/maven_home.sh
Copy the following lines and paste it (Shift+Insert) into the file:
export M2_HOME=/opt/maven
export MAVEN_HOME=/opt/maven
export PATH=${M2_HOME}/bin:${PATH}
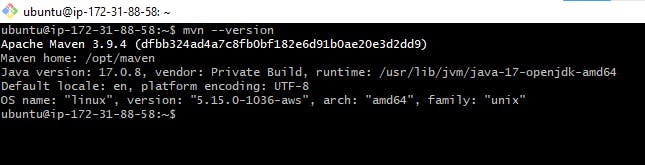
Next, save and exit the file. Log out and log in back to the system. Verify with the echo command that the M2_HOME and MAVEN_HOME values are correct, and the PATH variable contains an entry for maven. Finally, you can check the version information for Java and Maven with the following command:
sudo reboot
mvn --version
Install Git
sudo apt update
sudo apt install git -y
git --version
Install TOMCAT
Running Tomcat under the root user is a security risk. We’ll create a new system user and group with a home directory /opt/tomcat that will run the Tomcat service. To do so, enter the following command:
sudo useradd -m -U -d /opt/tomcat -s /bin/false tomcat
# Update the packages
sudo apt update
# Download tomcat
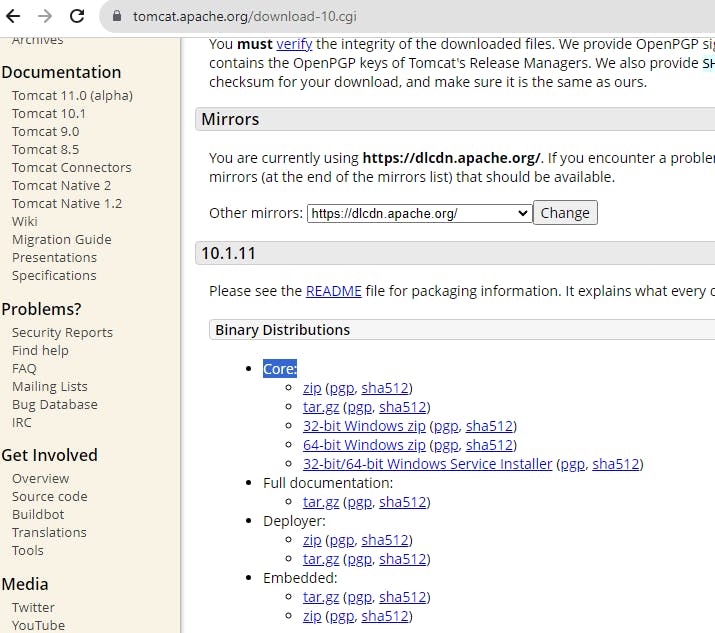
wget https://dlcdn.apache.org/tomcat/tomcat-9/v9.0.78/bin/apache-tomcat-9.0.78.tar.gz -P /tmp
# Extract Tomcat
sudo tar -xf /tmp/apache-tomcat-9.0.78.tar.gz -C /opt/tomcat/
Tomcat is updated regularly with security patches and new features. To have more control over versions and updates, we’ll create a symbolic link called latest, that points to the Tomcat installation directory:
sudo ln -s /opt/tomcat/apache-tomcat-${VERSION} /opt/tomcat/latest
sudo ln -s /opt/tomcat/apache-tomcat-9.0.78 /opt/tomcat/latest
The system user that was previously created must have access to the Tomcat installation directory. Change the directory ownership to user and group tomcat:
sudo chown -R tomcat: /opt/tomcat
The shell scripts inside the Tomcat’s bin directory must be executable
sudo sh -c 'chmod +x /opt/tomcat/latest/bin/*.sh'
Instead of using the shell scripts to start and stop the Tomcat server, we’ll set it to run as a service called tomcat.service
sudo nano /etc/systemd/system/tomcat.service
Paste the below
[Unit]
Description=Tomcat 9 servlet container
After=network.target

[Service]
Type=forking

User=tomcat
Group=tomcat

Environment="JAVA_HOME=/usr/lib/jvm/java-17-openjdk-amd64"
Environment="JAVA_OPTS=-Djava.security.egd=file:///dev/urandom -Djava.awt.headless=true"

Environment="CATALINA_BASE=/opt/tomcat/latest"
Environment="CATALINA_HOME=/opt/tomcat/latest"
Environment="CATALINA_PID=/opt/tomcat/latest/temp/tomcat.pid"
Environment="CATALINA_OPTS=-Xms512M -Xmx1024M -server -XX:+UseParallelGC"

ExecStart=/opt/tomcat/latest/bin/startup.sh
ExecStop=/opt/tomcat/latest/bin/shutdown.sh

[Install]
WantedBy=multi-user.target
Modify the JAVA_HOME variable if the path to your Java installation is different.
Save and close the file and notify the system that a new unit file exists:
sudo systemctl daemon-reload
Enable and start the Tomcat service:
sudo systemctl enable --now tomcat
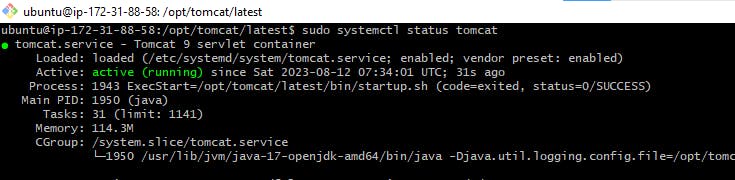
Check the service status:
sudo systemctl status tomcat
The output should show that the Tomcat server is enabled and running:
You can start, stop and restart Tomcat the same as any other system service:
sudo systemctl start tomcat
sudo systemctl stop tomcat
sudo systemctl restart tomcat
Tomcat runs on port 8080 likewise Jenkins, so we will change Tomcat port to 8000. We will configure it server.xml
sudo nano /opt/tomcat/latest/conf/server.xml
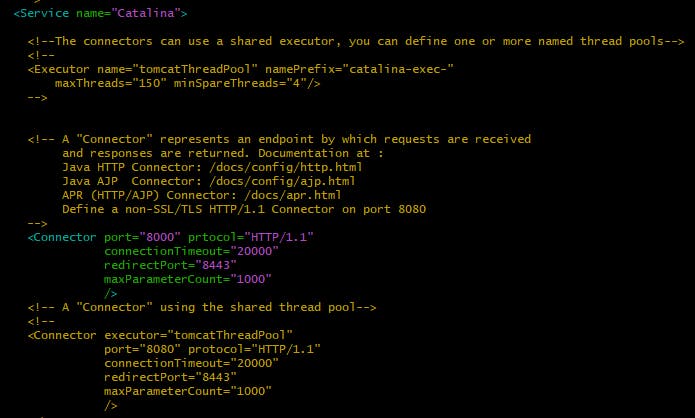
Save the changes. Stop and restart the tomcat again
sudo systemctl start tomcat
sudo systemctl status tomcat
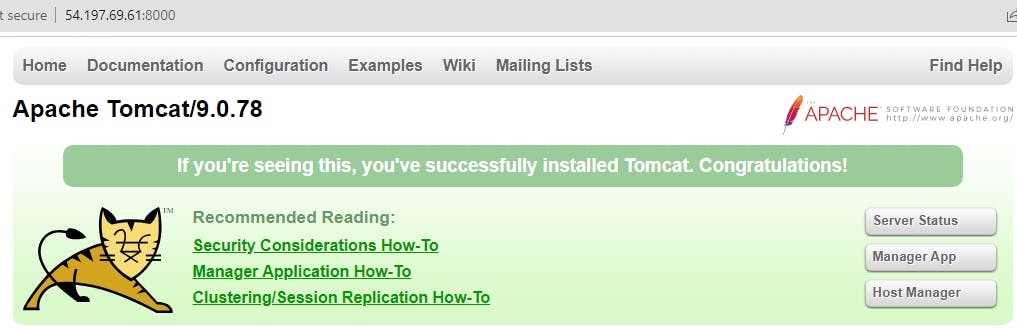
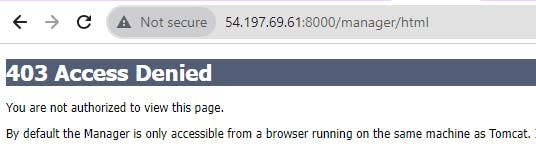
Access the Tomcat server using <Instancepublicip:8000> in a web browser.
If you click on Manager App, it will throw 403 Access Denied
To fix this access issue we need to configure the context.xml file and tomcat-users.xml
sudo nano /opt/tomcat/latest/webapps/manager/META-INF/context.xml
Comment out the Valve ClassName Section

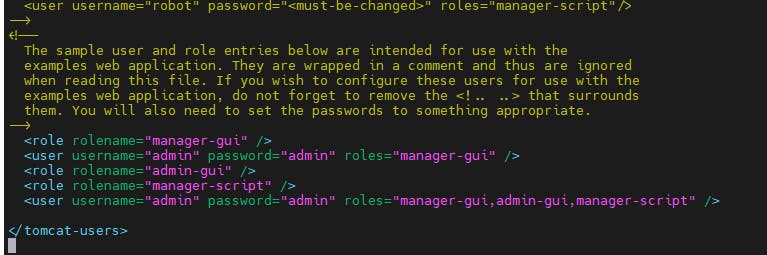
Configure tomcat-user.xml
sudo nano /opt/tomcat/latest/conf/tomcat-users.xml
Add the below roles and password
 <role rolename="manager-gui" />
  <user username="admin" password="admin" roles="manager-gui" />
  <role rolename="admin-gui" />
  <role rolename="manager-script" />
  <user username="admin" password="admin" roles="manager-gui,admin-gui,manager-script" />
Stop the Tomcat server and start it
sudo systemctl start tomcat
sudo systecmctl status tomcat
Access the Tomcat server

Click on Manager App and provide the user and password details
In case any error occurs like (/manager/html) is not available".
sudo chmod -R 777 /opt/tomcat
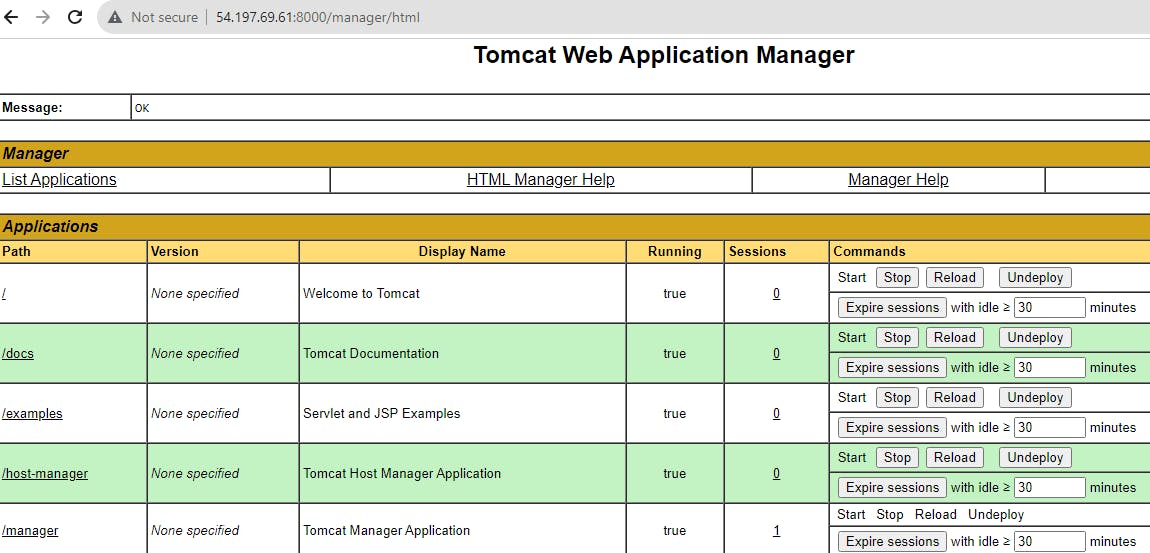
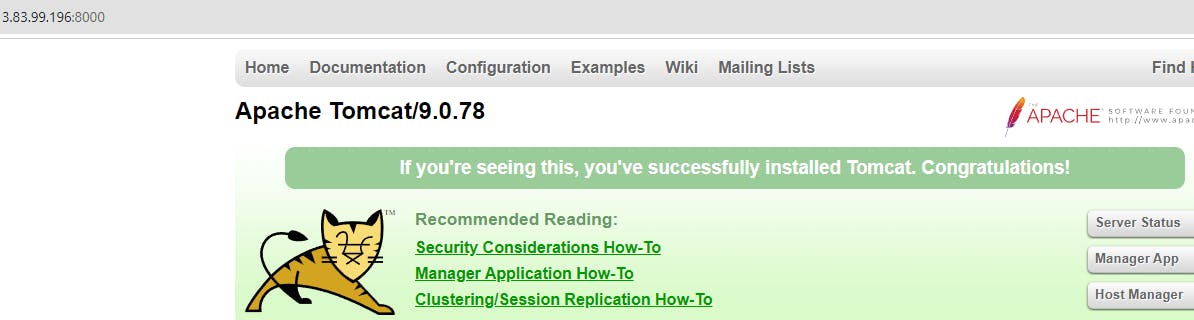
Now our Tomcat server is ready.
Install Jenkins
Create a new EC2 instance and install Jenkins

Java installation commands
sudo apt update
sudo apt install openjdk-17-jre -y
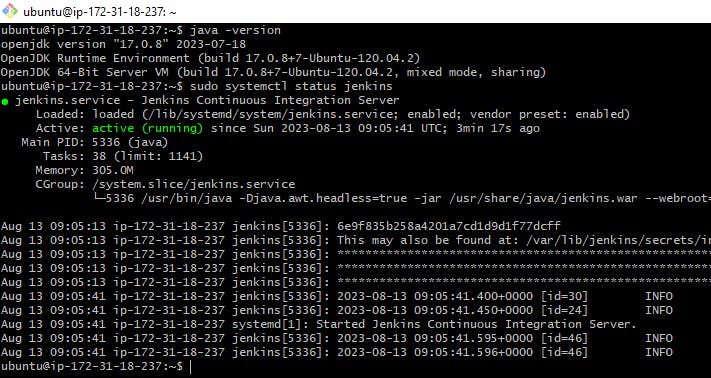
java -version
Jenkins installation commands
curl -fsSL https://pkg.jenkins.io/debian/jenkins.io-2023.key | sudo tee \
  /usr/share/keyrings/jenkins-keyring.asc > /dev/null
echo deb [signed-by=/usr/share/keyrings/jenkins-keyring.asc] \
  https://pkg.jenkins.io/debian binary/ | sudo tee \
  /etc/apt/sources.list.d/jenkins.list > /dev/null
sudo apt-get update
sudo apt-get install jenkins -y
Start Jenkins
You can enable the Jenkins service to start at boot with the command:
# Enable the Jenkins service to start at boot
$ sudo systemctl enable jenkins

# start the Jenkins service
$ sudo systemctl start jenkins

# check the status of the Jenkins service
$ sudo systemctl status jenkins
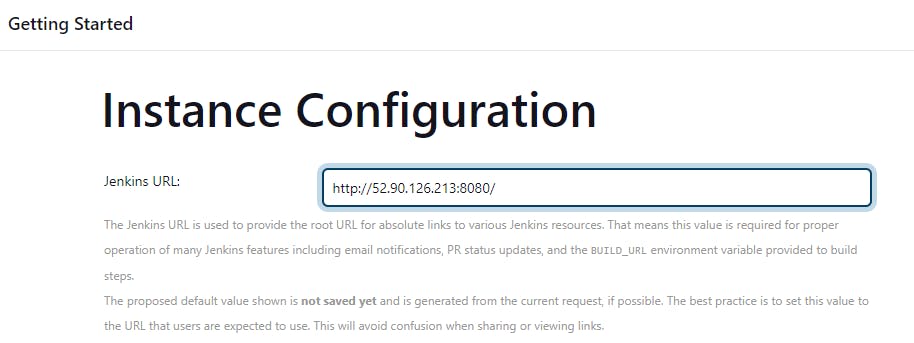
Access the Jenkin server with <EC2PublicIP:8080> in a web browser
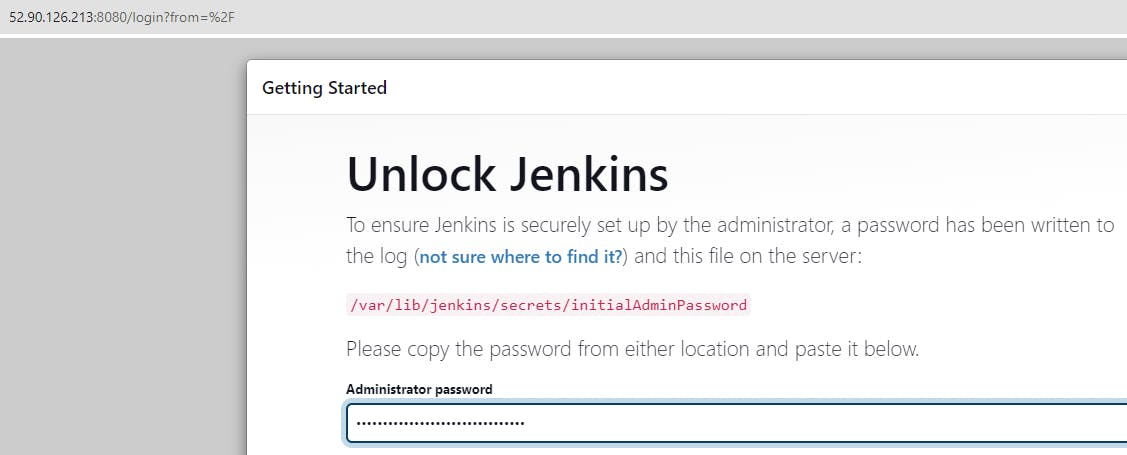
# Copy the adminpassword from the terminal and click on continue
$ sudo cat /var/lib/jenkins/secrets/initialAdminPassword
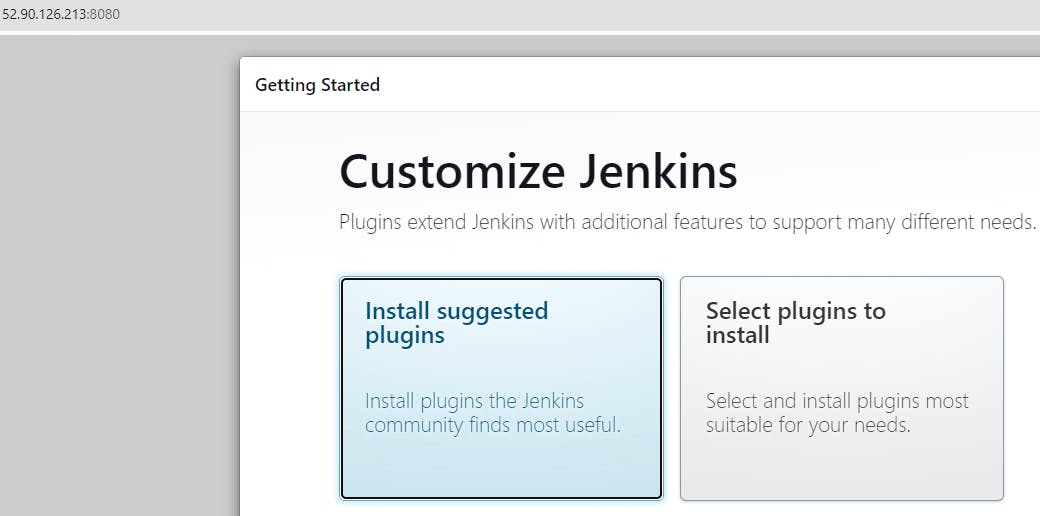
Click on Install suggested Jenkins
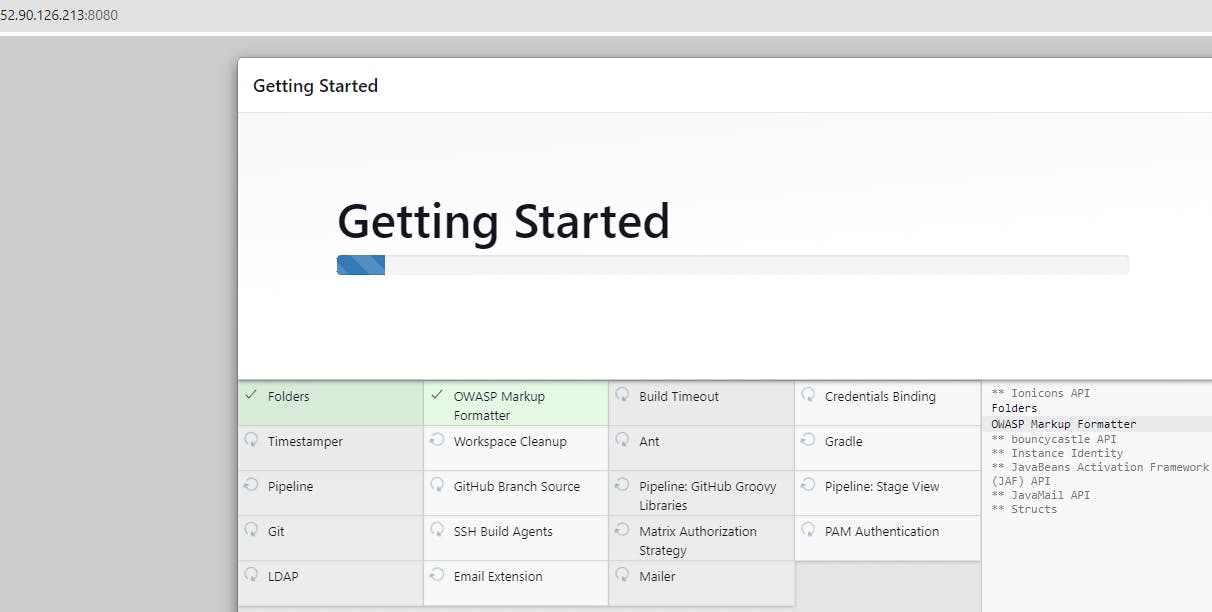
Starts installing all the required plugins
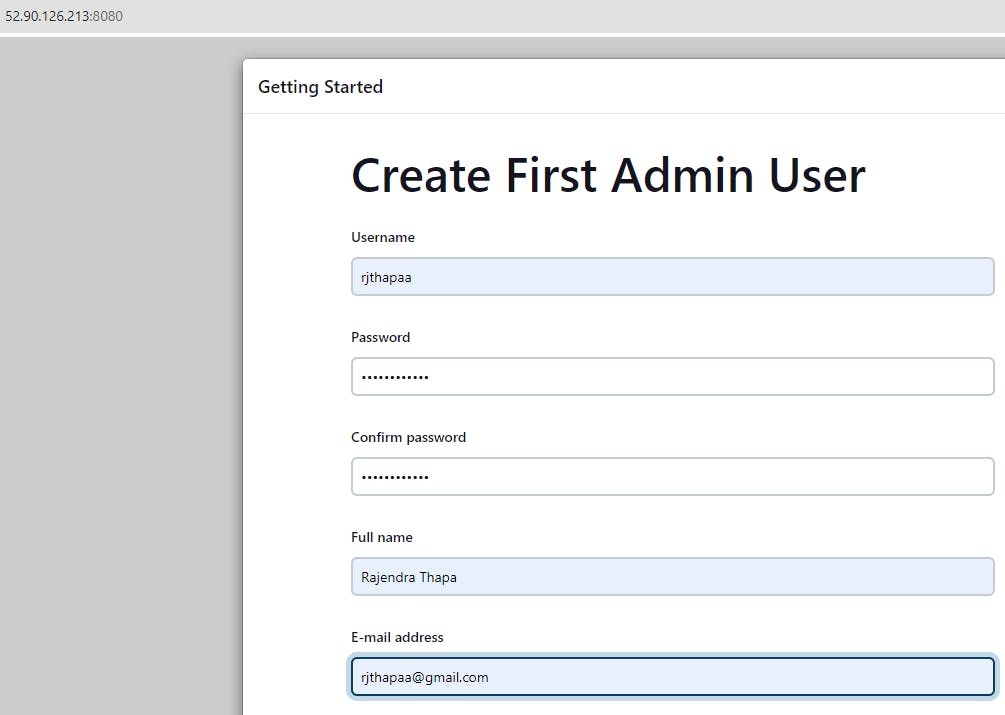
Configure your Username, Password, Fullname, Email and click on save and continue
Click on Save and Finish
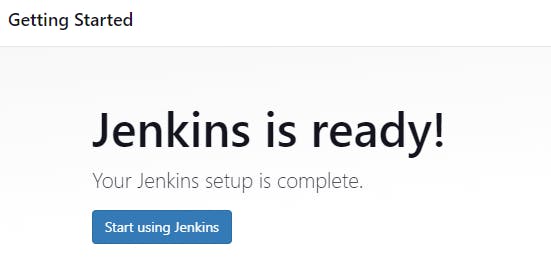
Click on Start using Jenkins
Let's integrate GitHub with Jenkins through SSH
Create an SSH key on the EC2 instance on which Jenkins is installed
C0mmand to generate SSH key
ssh-keygen
Once you paste the command, provide the path where you want to store the keys, else you can just hit enter and continue.
By default, both id_rsa(private) and id_rsa.pub(public key) keys are stored in.ssh directory
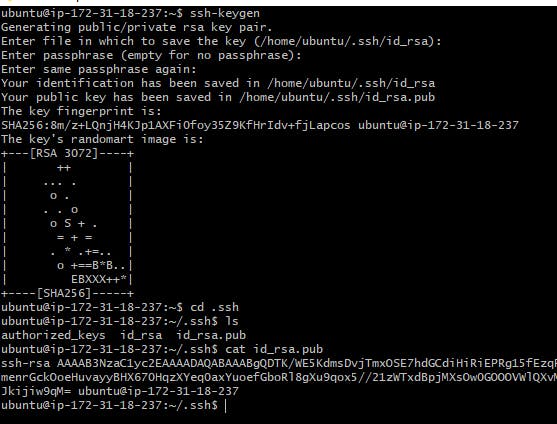
cd .ssh
cat id_rsa.pub
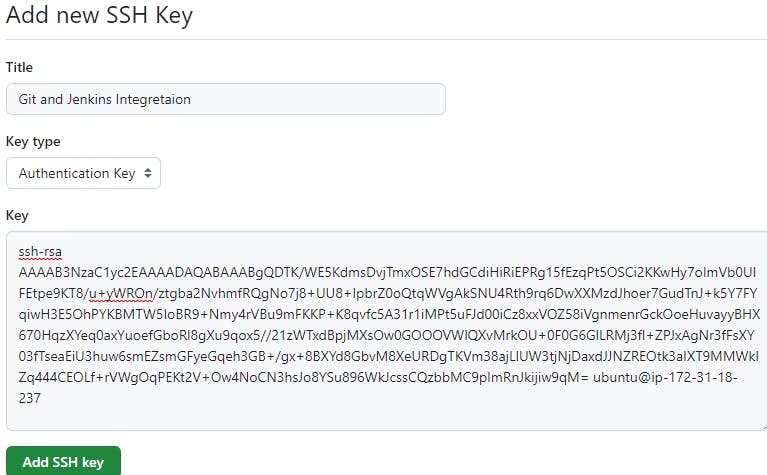
Copy the id_rsa.pub from the terminal and open your GitHub account and navigate to Settings> SSH and GPG Keys > New SSH key
Provide the name and paste the id_rsa.pub in the key section and click on Add SSH key
Our key is added in GitHub now we need to configure the same in the Jenkins server
Navigate to Jenkins Dashboard > Manage Jenkins > Security - Credentials > Global > Add Credentials
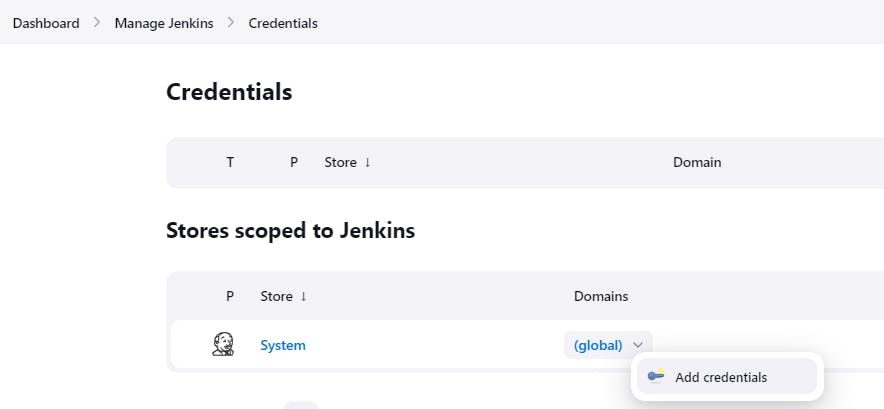
Select the Kind as SSH Username with the private key
username = Ubuntu
Description as Gitcreds
Private key > Enter directly > Add > Paste the Private key(id_rsa) and click on Create
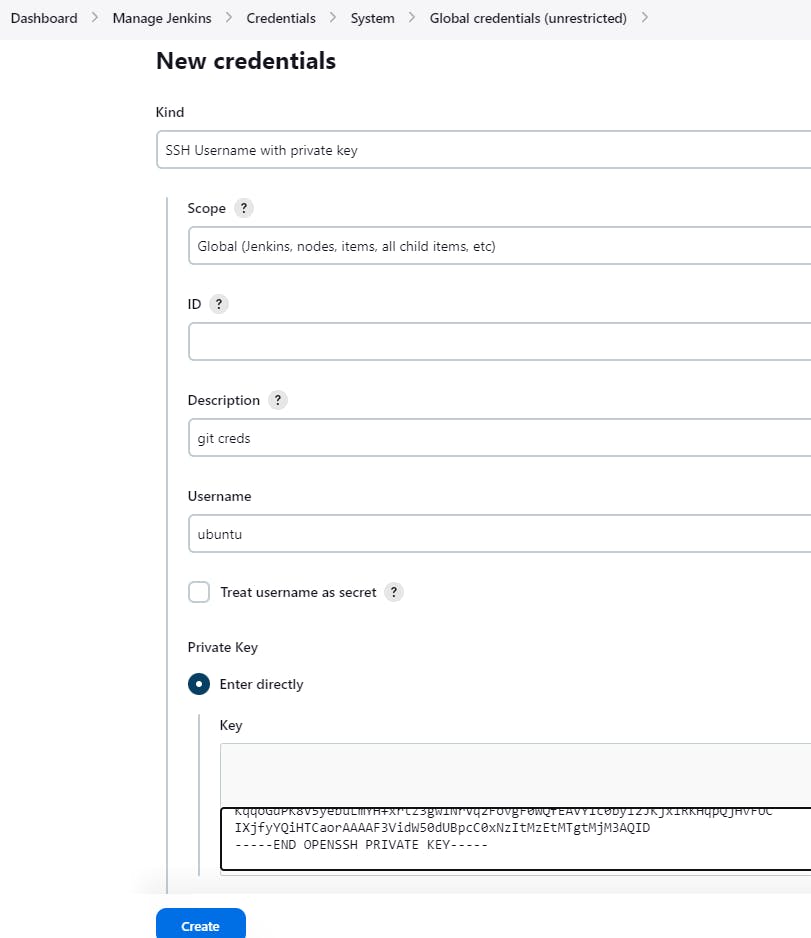
Our credentials are created and the integration between Jenkins and GitHub is done

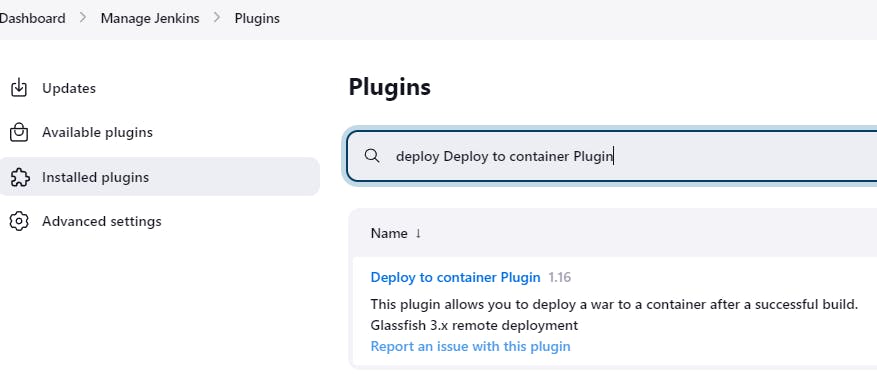
Install all the Plugs required for deploying .war file in TOMCAT server using Jenkins
Jenkins Dashboard > Manage Jenkins > Plugins > Available Plugins and install Deploy to container Plugin
Jenkins Dashboard > Manage Jenkins >System Configuration > Tools and add the following
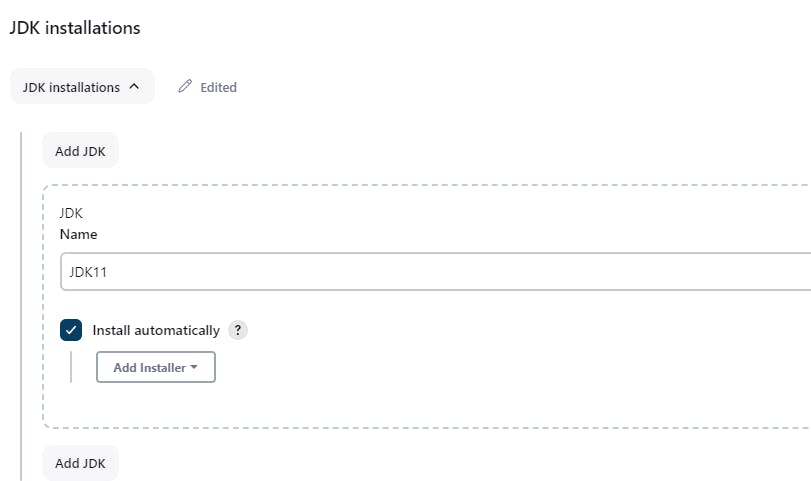
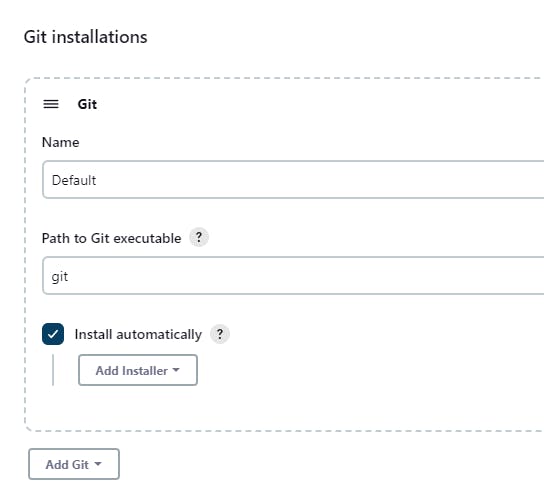

and save it.
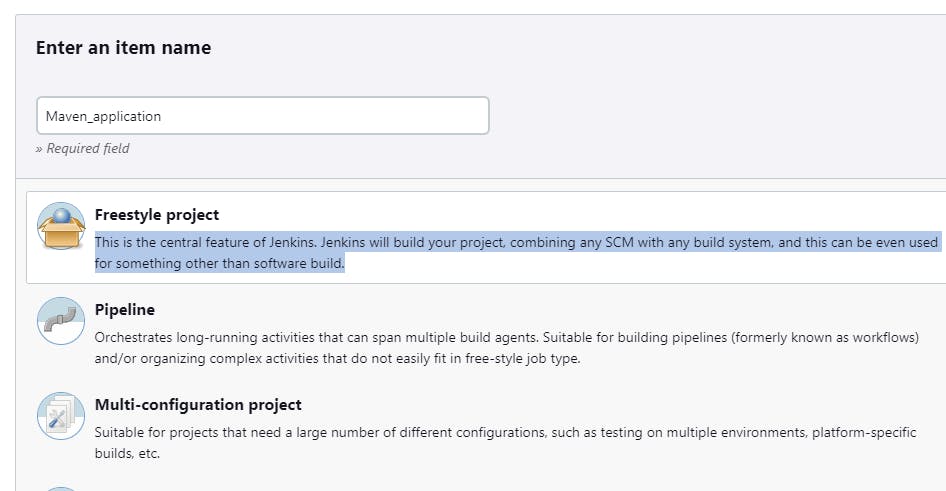
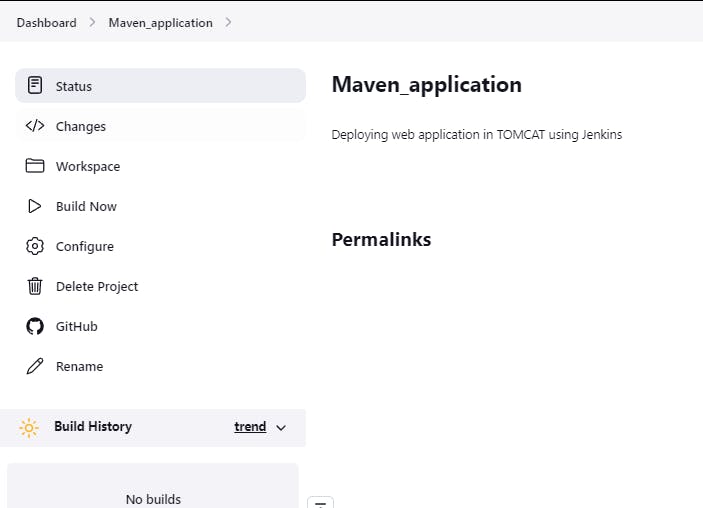
Create a freestyle project in Jenkins
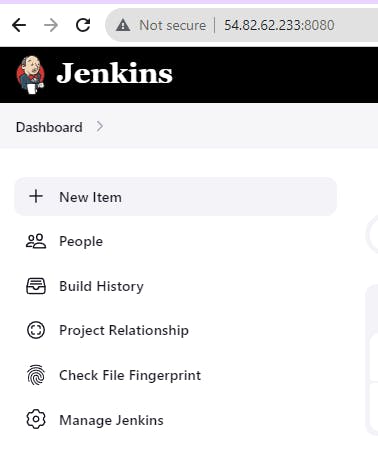
Jenkins dashboard > click on + New item
Provide the name and select the project as a Freestyle project
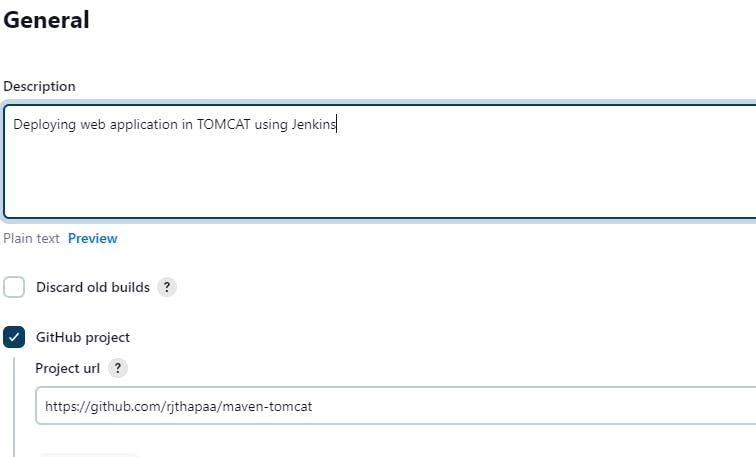
In the general section add a description and select it as a GitHub project with a URL
https://github.com/rjthapaa/maven-tomcat
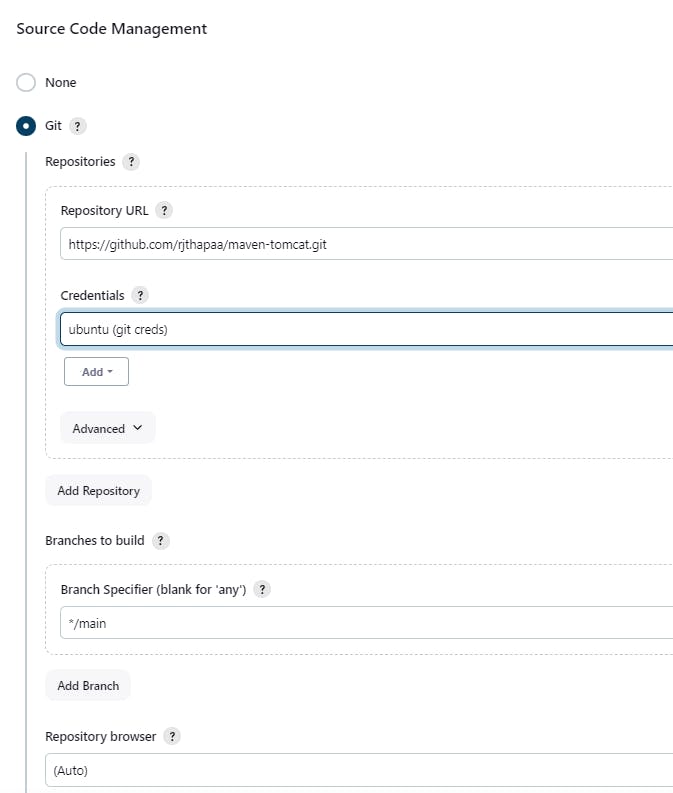
Under Source Code Management, select it as Git and add the Git repository URL
For credentials use the ubuntu (git creds) that we previously created
Select the branch as main, where we have our code
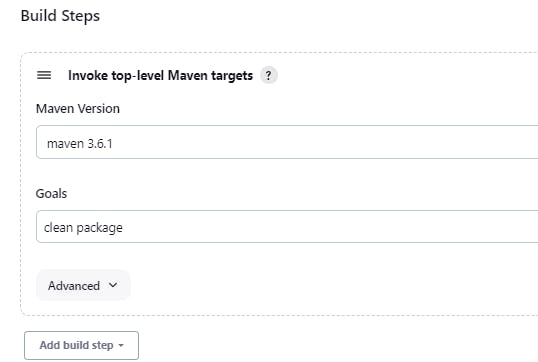
Under Build steps, select it as Invoke top-level Maven targets.
Select the Maven Version and Goals as a clean package
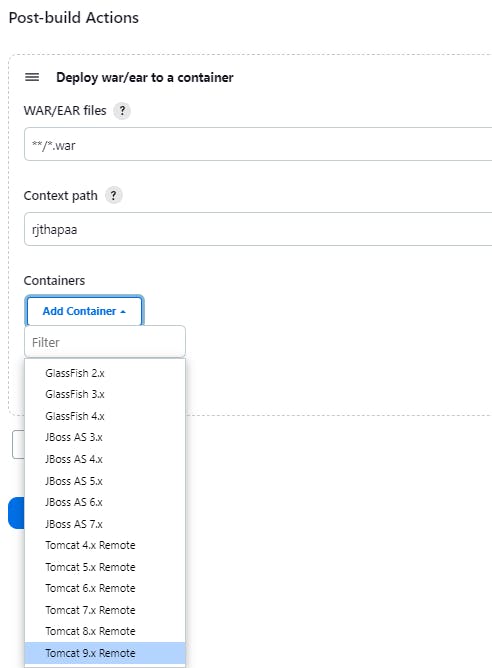
Under Post-build Actions, select it as Deploy war/ear to a container
WAR/EAR files as **/*.war
Context path can be anything and Containers should be your Tomcat version 9.x
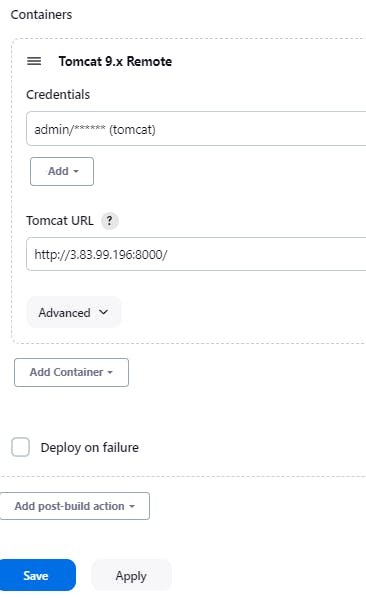
Add the credentials of the tomcat in Manage Jenkins > Credentials > System > Global credentials (unrestricted) as we did for Git credentials
Add the Tomcat instance ip with a port no in the TOMCAT URL section and click on Save
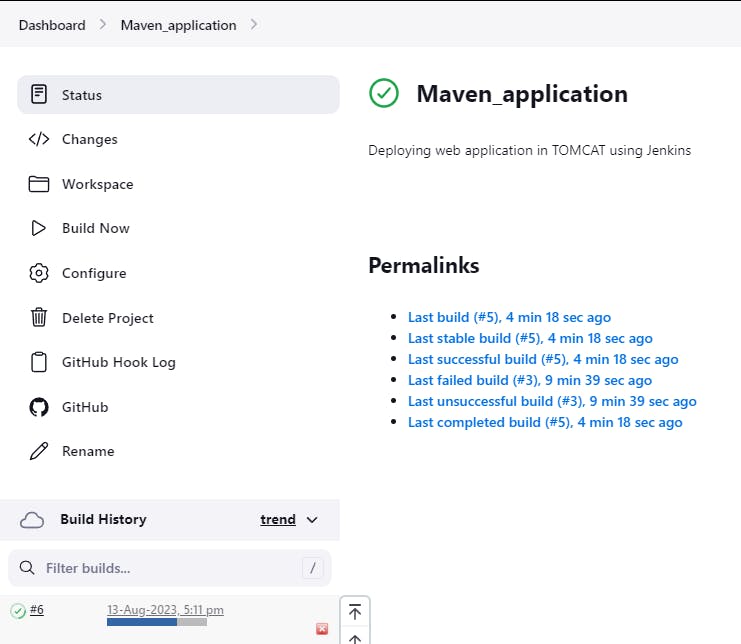
Click on Build now to deploy the Web application
Deployment has started and is successful
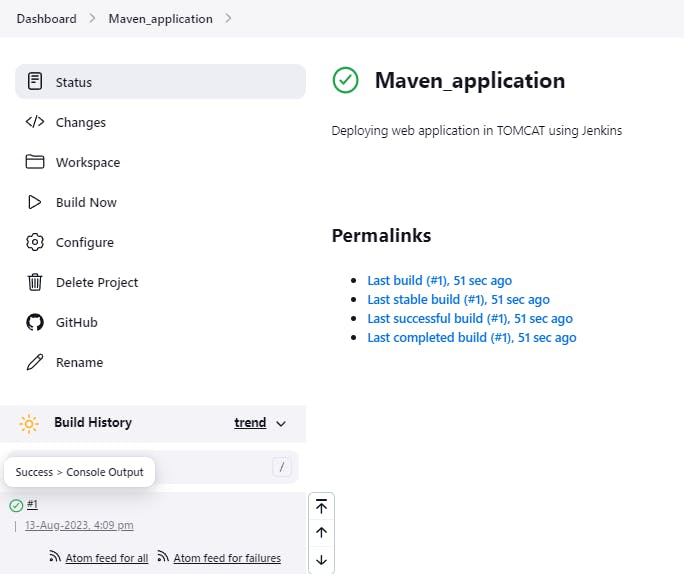
Click on Success > Console Output > Console output
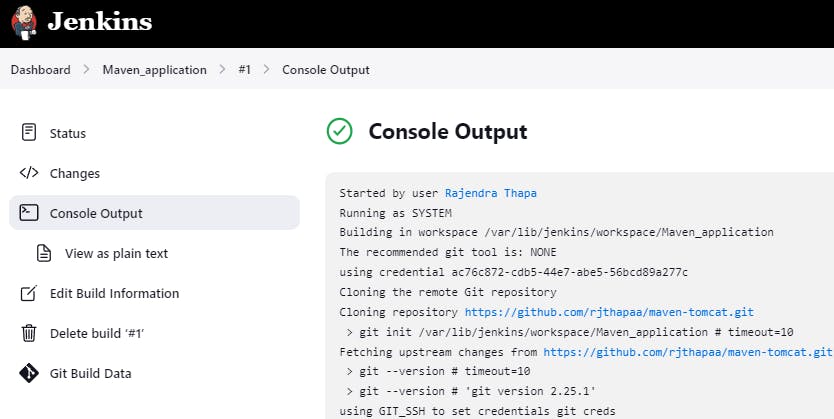
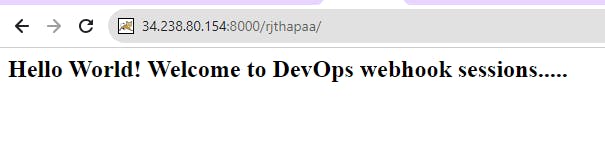
Web application deployment is successful, let's check our application in the TOMCAT server.
Click on Manager App
Under Applications and Path, you can see /rjthapaa the context path that we provided during configuring Post-build actions in Jenkins
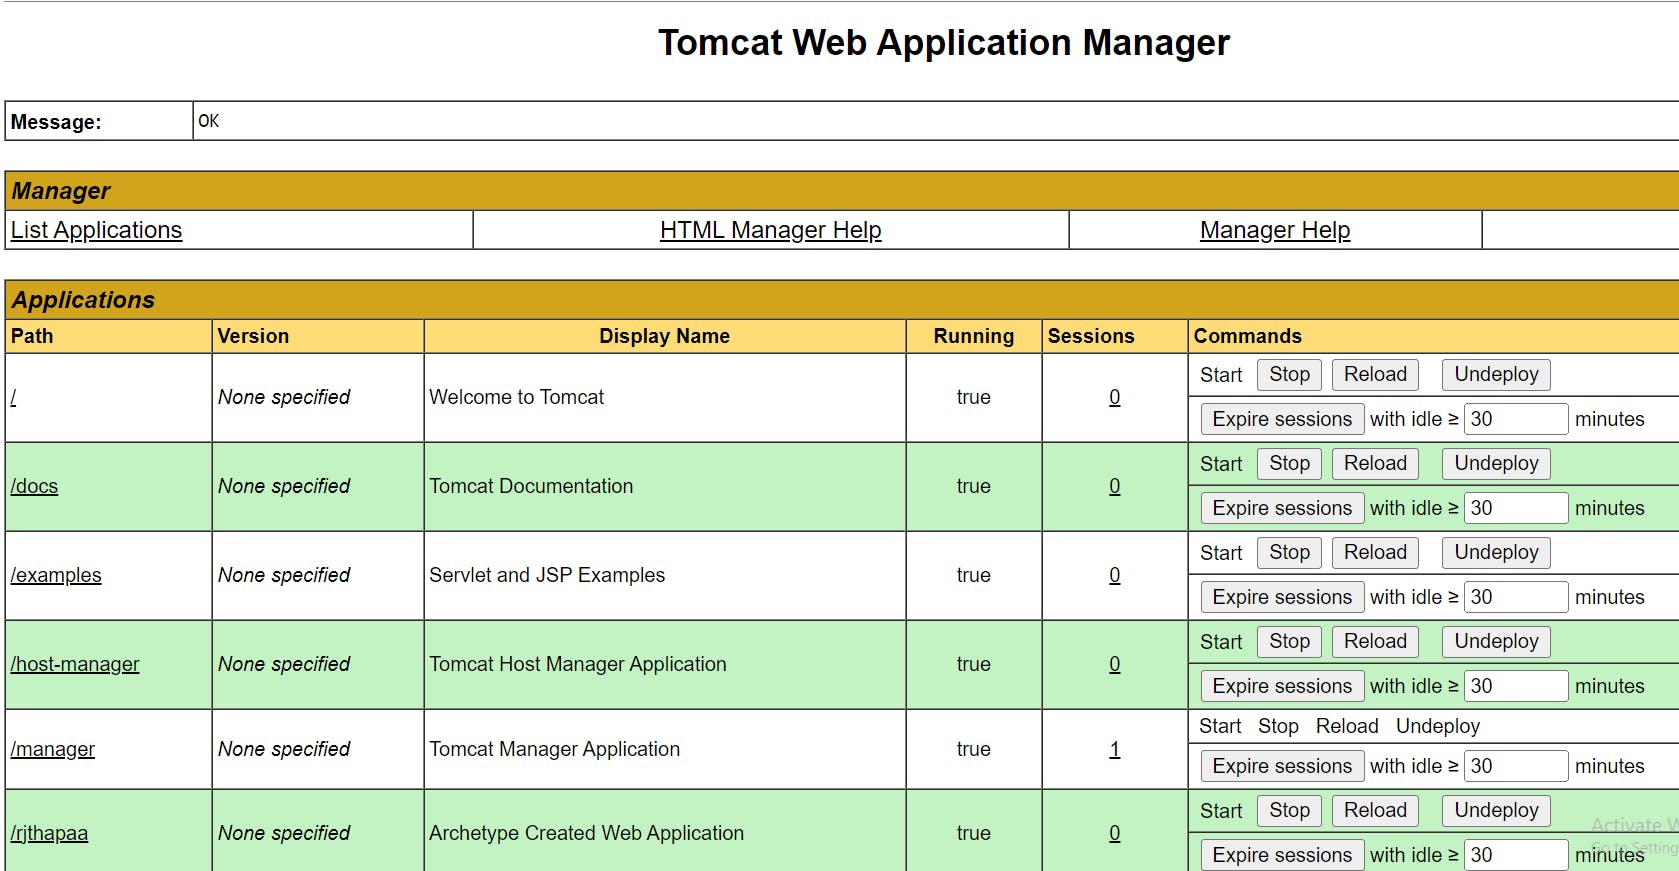
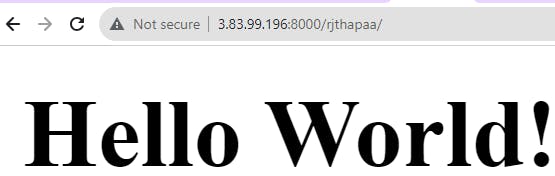
Click on /rjthapaa to access the application
We can also auto-trigger the deployment by using GitHub hook trigger for GITScm polling
Open the project in Jenkins, under Build triggers, enable GitHub hook trigger for GITScm polling

Go to the GitHub repo and make some changes to the code and commit it.
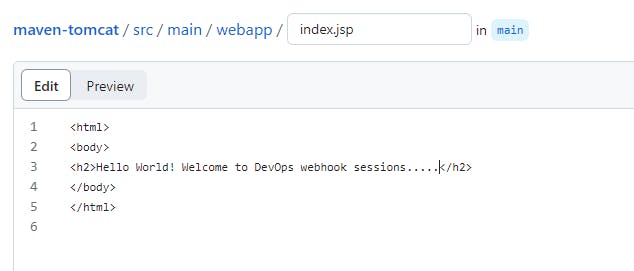
Pollscm had auto-triggered the jobs in Jenkins
Check the application changes in the TOMCAT server